

February 9, 2021

10 min
Read
Generating Automated Documents using Workiom, Zapier & Google Docs
If you are using Workiom for Customer Relationship Management (CRM) or tracking your Sales Orders

If you are using Workiom for Customer Relationship Management (CRM) or tracking your Sales Orders
.webp)
If you are using Workiom for Customer Relationship Management (CRM) or tracking your Sales Orders, you may want to generate invoices directly from your data in Workiom. Even though we will use invoices as an example, there are many use cases for generating automated documents and actually it is on our product plan to add it as a feature in Workiom too. But until it is ready, there is another way to generate automated documents with your Workiom data using Zapier and Google Docs. In this post, we will explain how we can generate automated invoices for the Sales Order Records in our Workiom app. It is an easy, 3-step process that requires a Workiom account, a Zapier account and a Google Docs account...
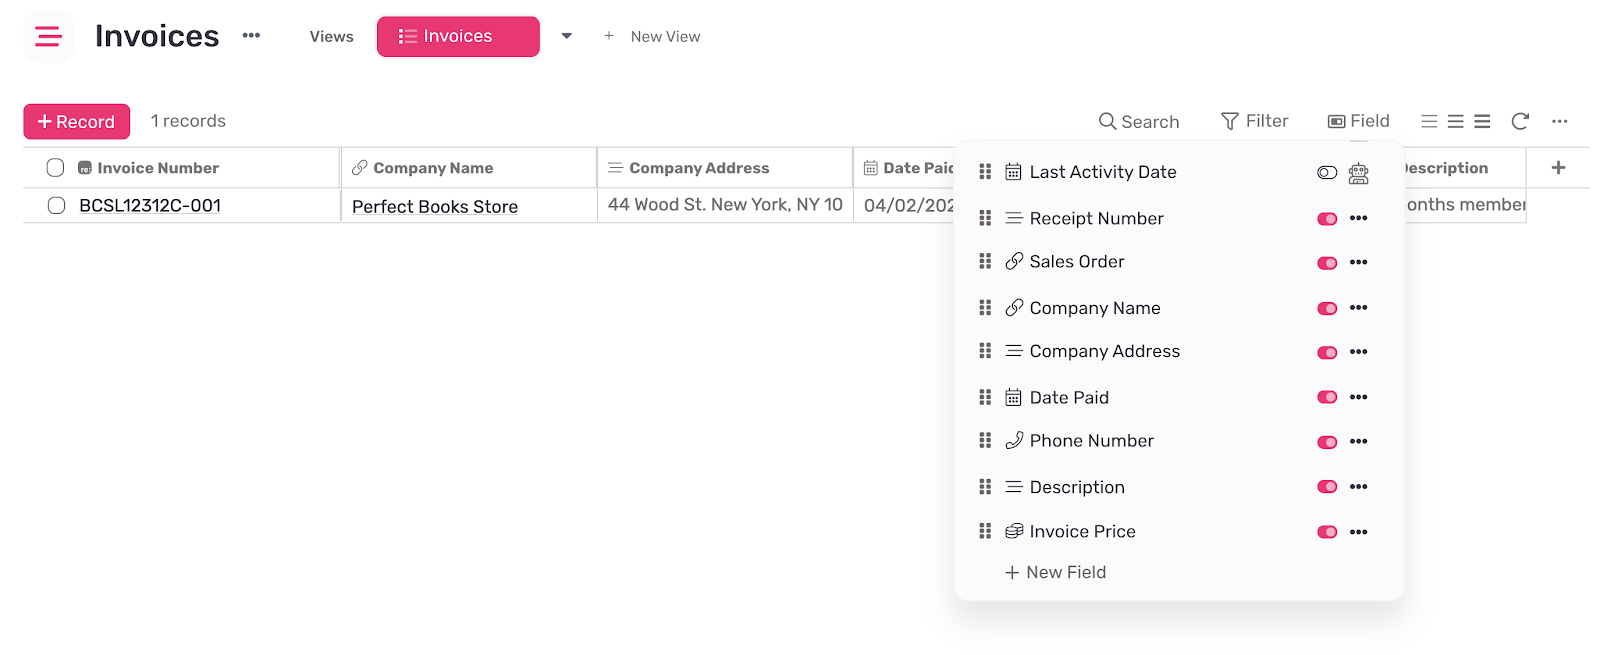
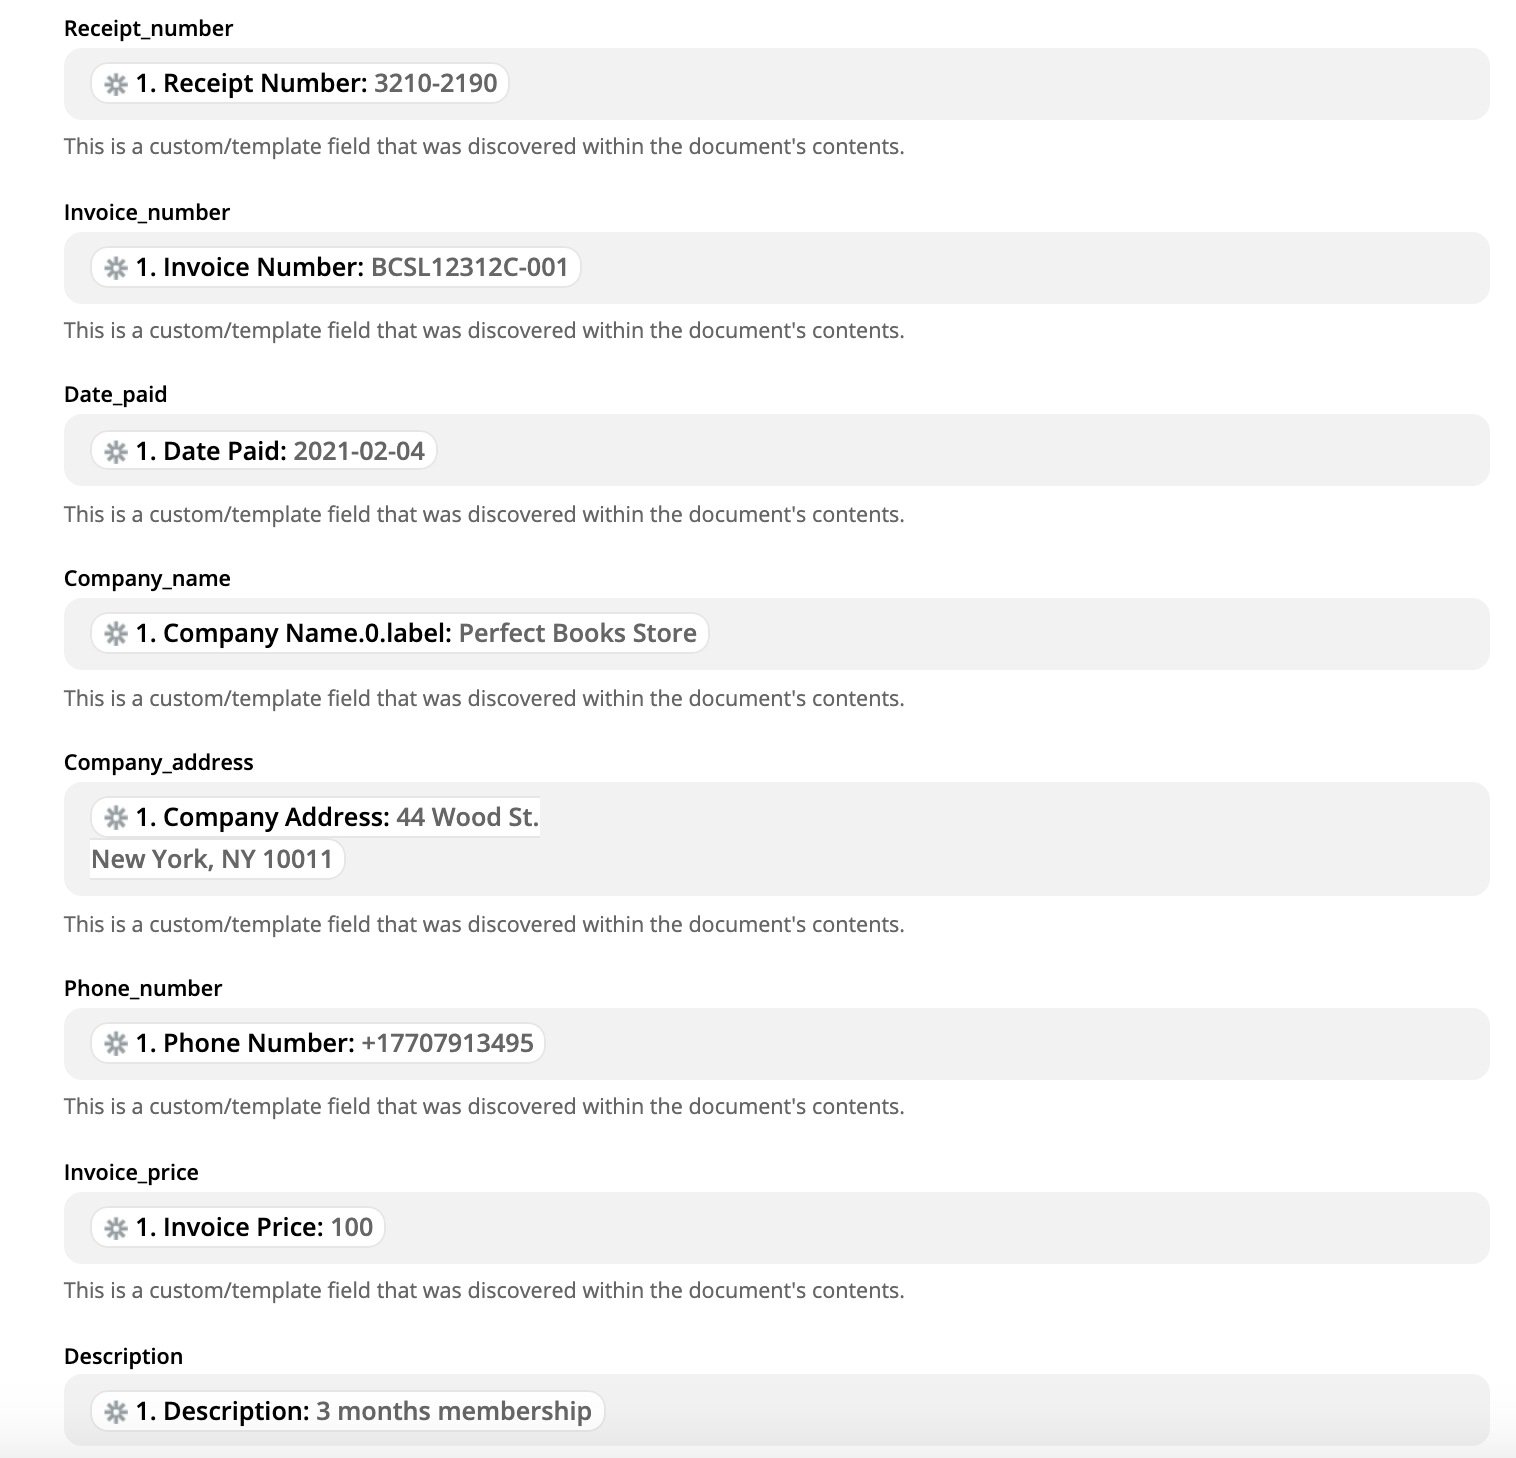
‘Invoices’ list can be used with the CRM app or the Sales Order Tracking or a separate app for accounting purposes. In this example, I chose to use it with Sales Orders. So I created a new list in Sales Order Tracking template and added the related fields such as; invoice number, receipt number, company address, company phone number, order description, invoice price, date paid.. Many of which are lookup fields from the sales record or client information. You can add whatever information you need for the invoices.
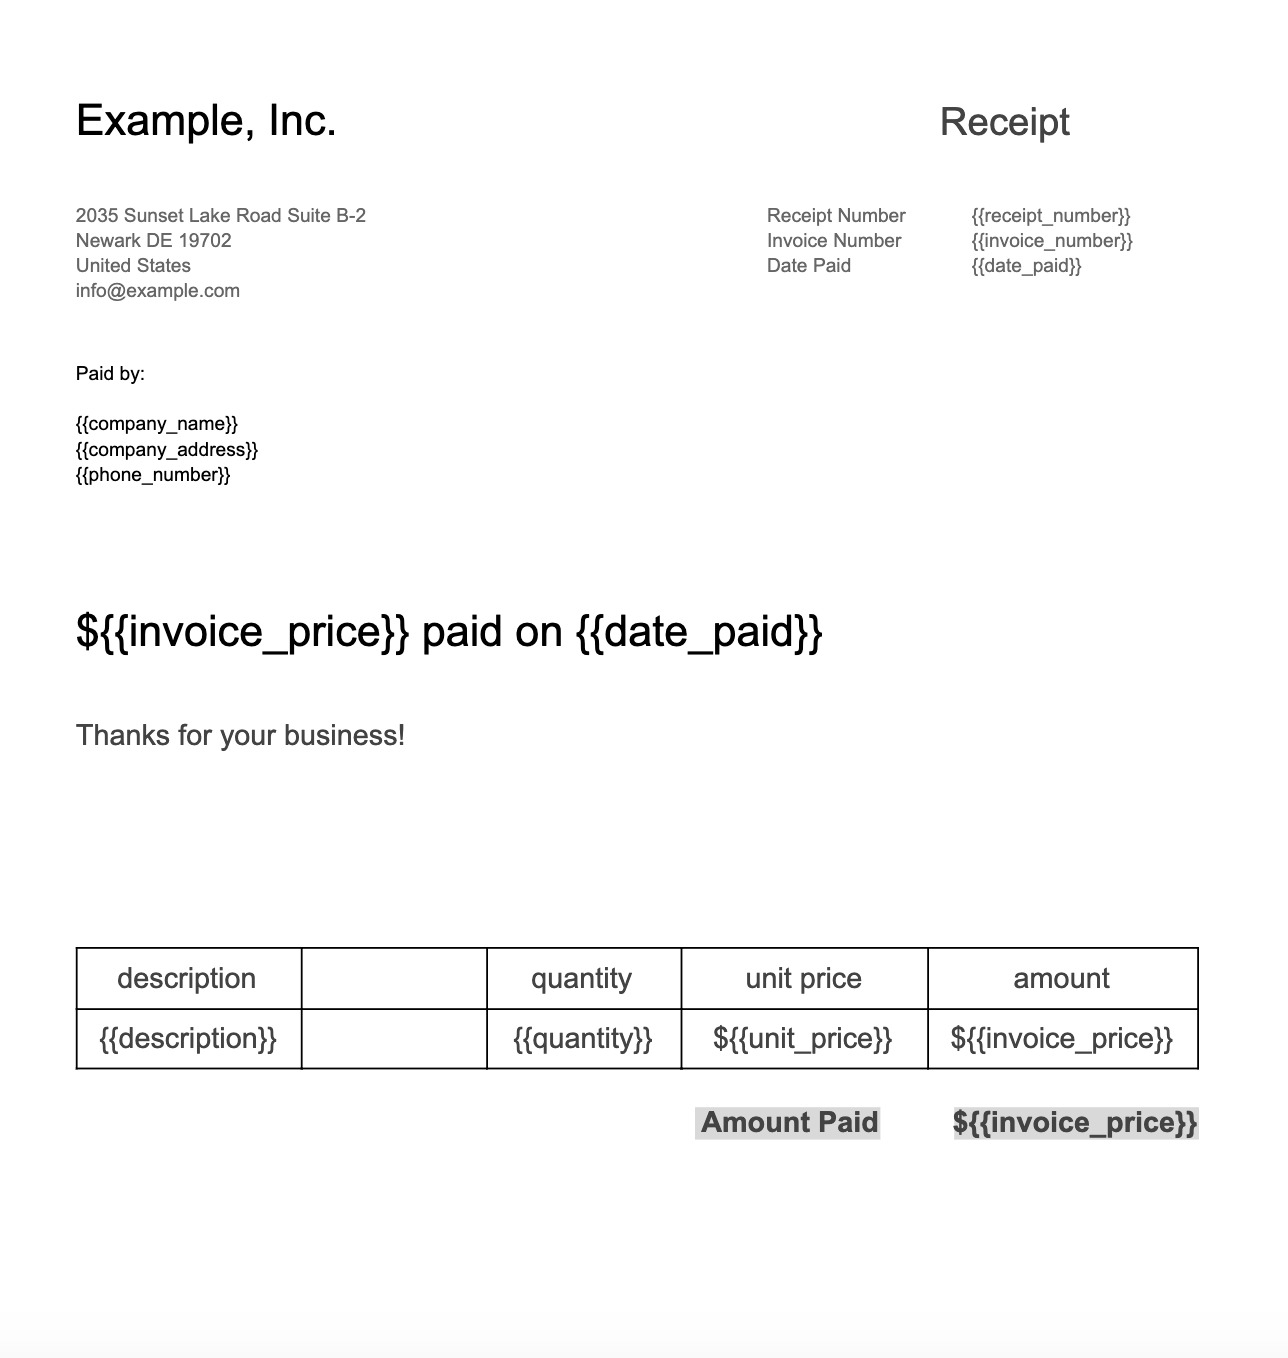
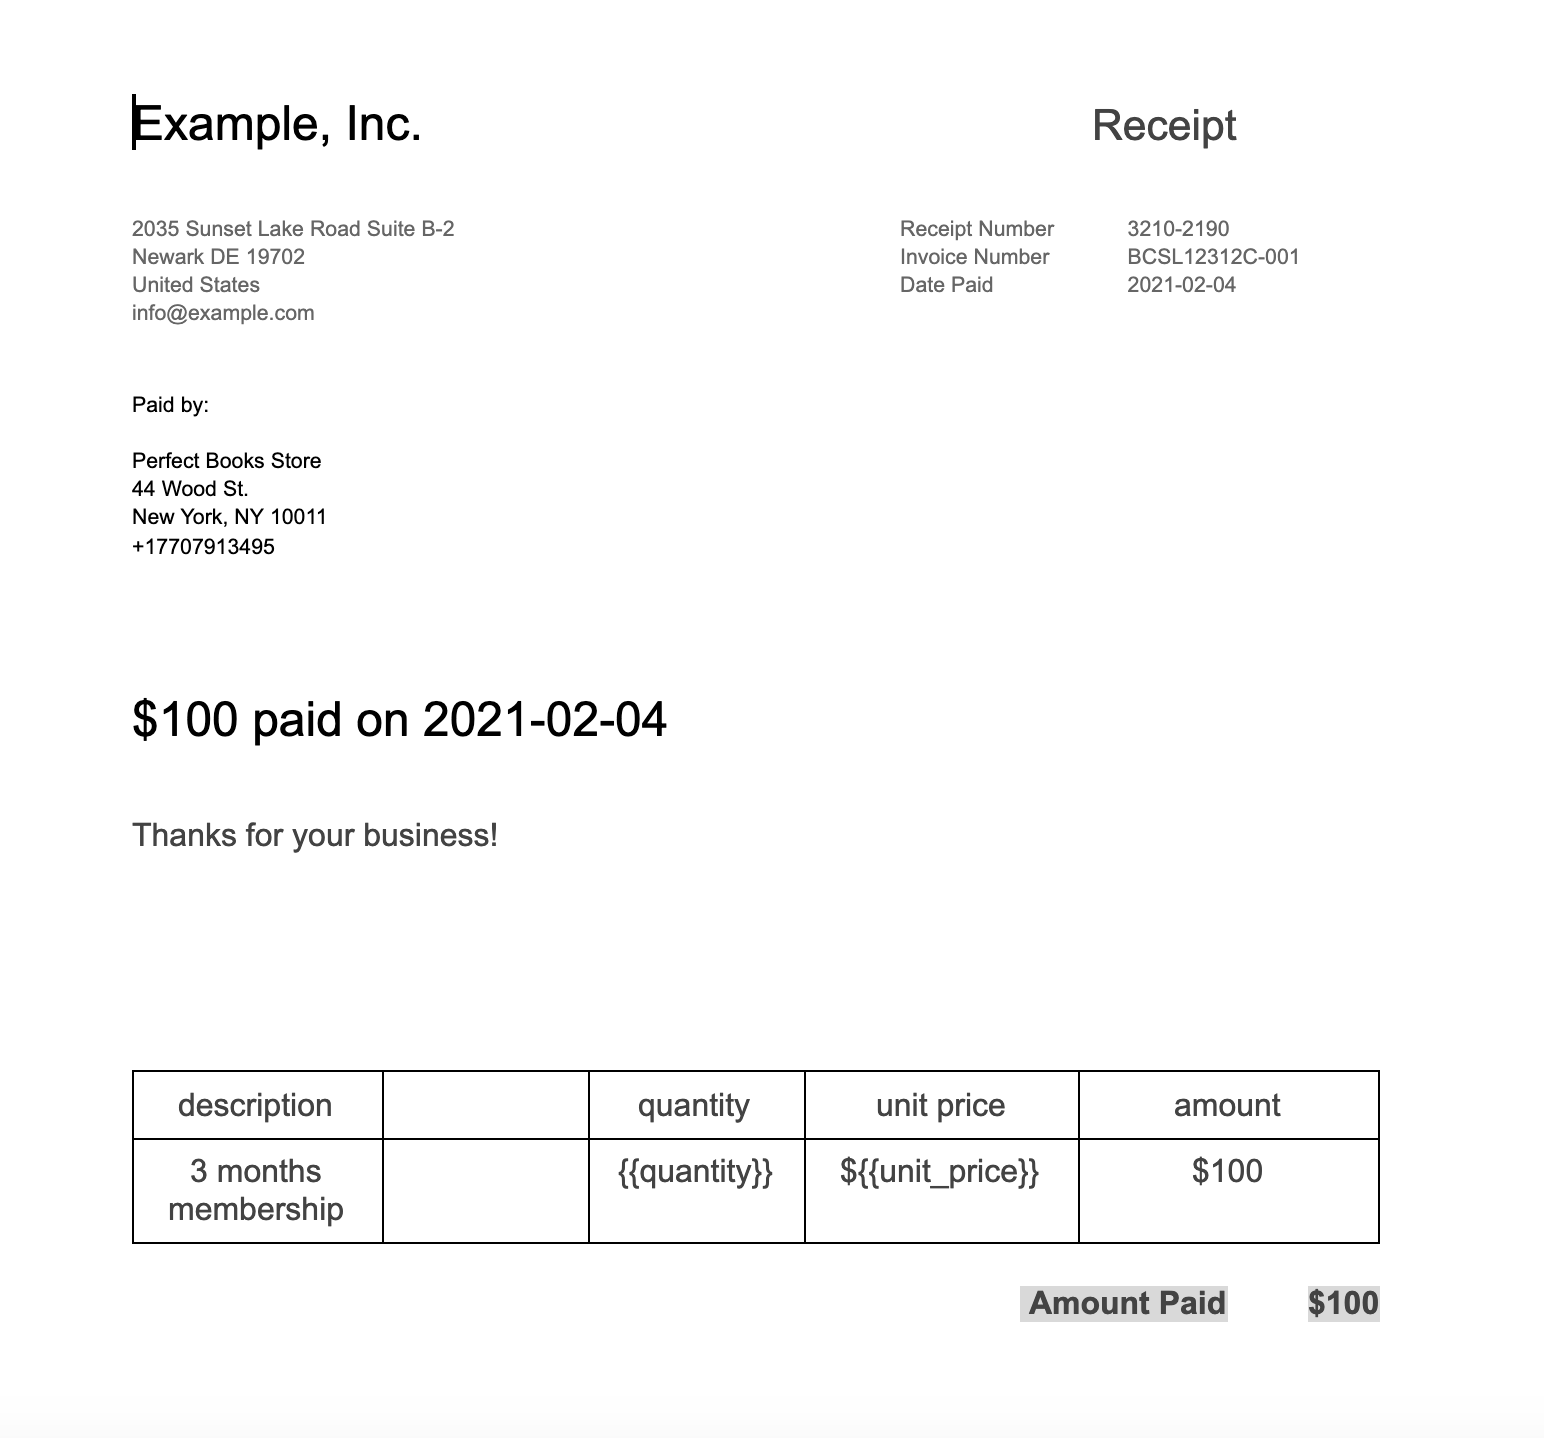
Now we need to create the invoice template in Google Docs. In order to create a template, you should first create it as a normal document with dynamic fields {{company_name}} , {{date_paid}} etc. wherever you want to add data automatically. You can name these fields similar to Workiom field names for easy recognition on Zapier. Here is my invoice template example:
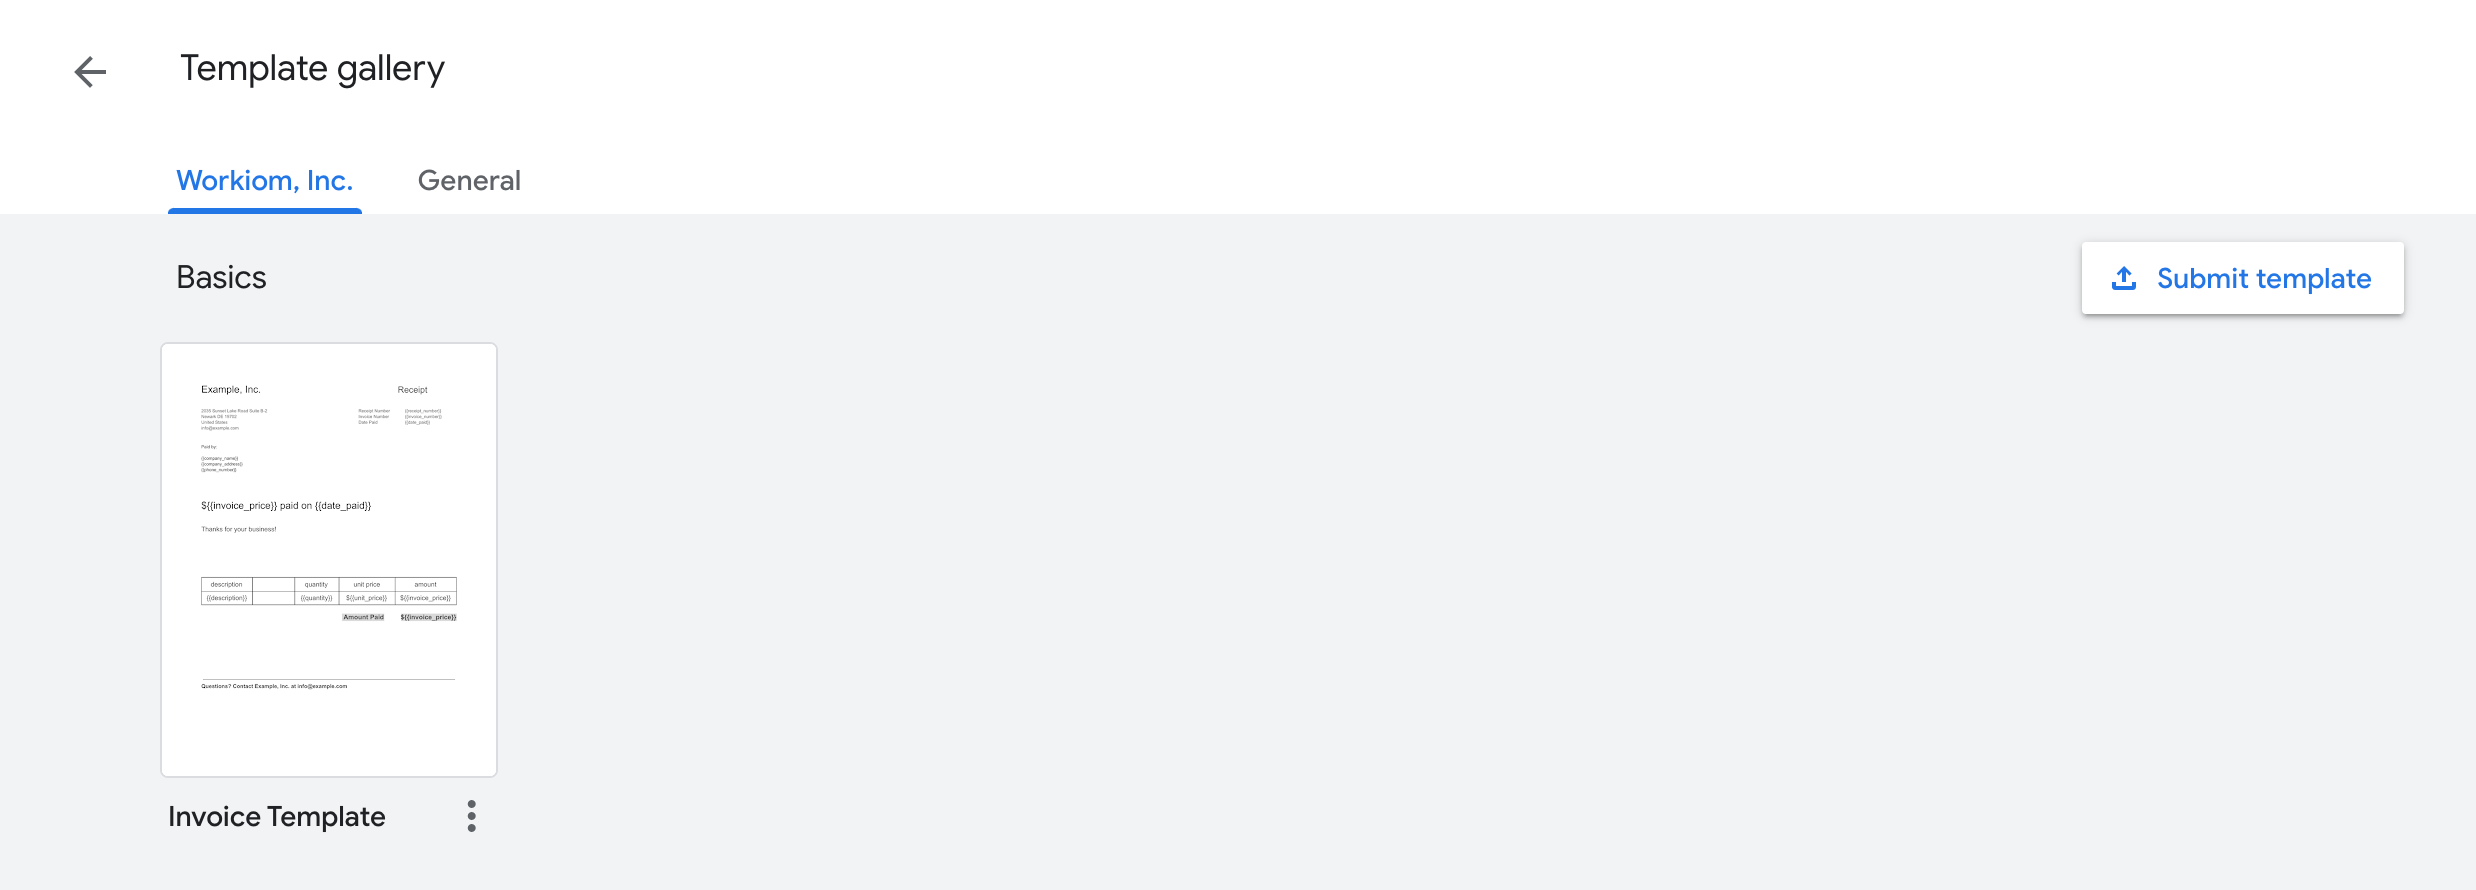
After you created the invoice template document, open the templates gallery on Google Docs main page and click on ‘Submit Template’. Choose the template you created for invoices, choose a category and click on save. Now we added the invoice template to our company’s template gallery on Google Docs
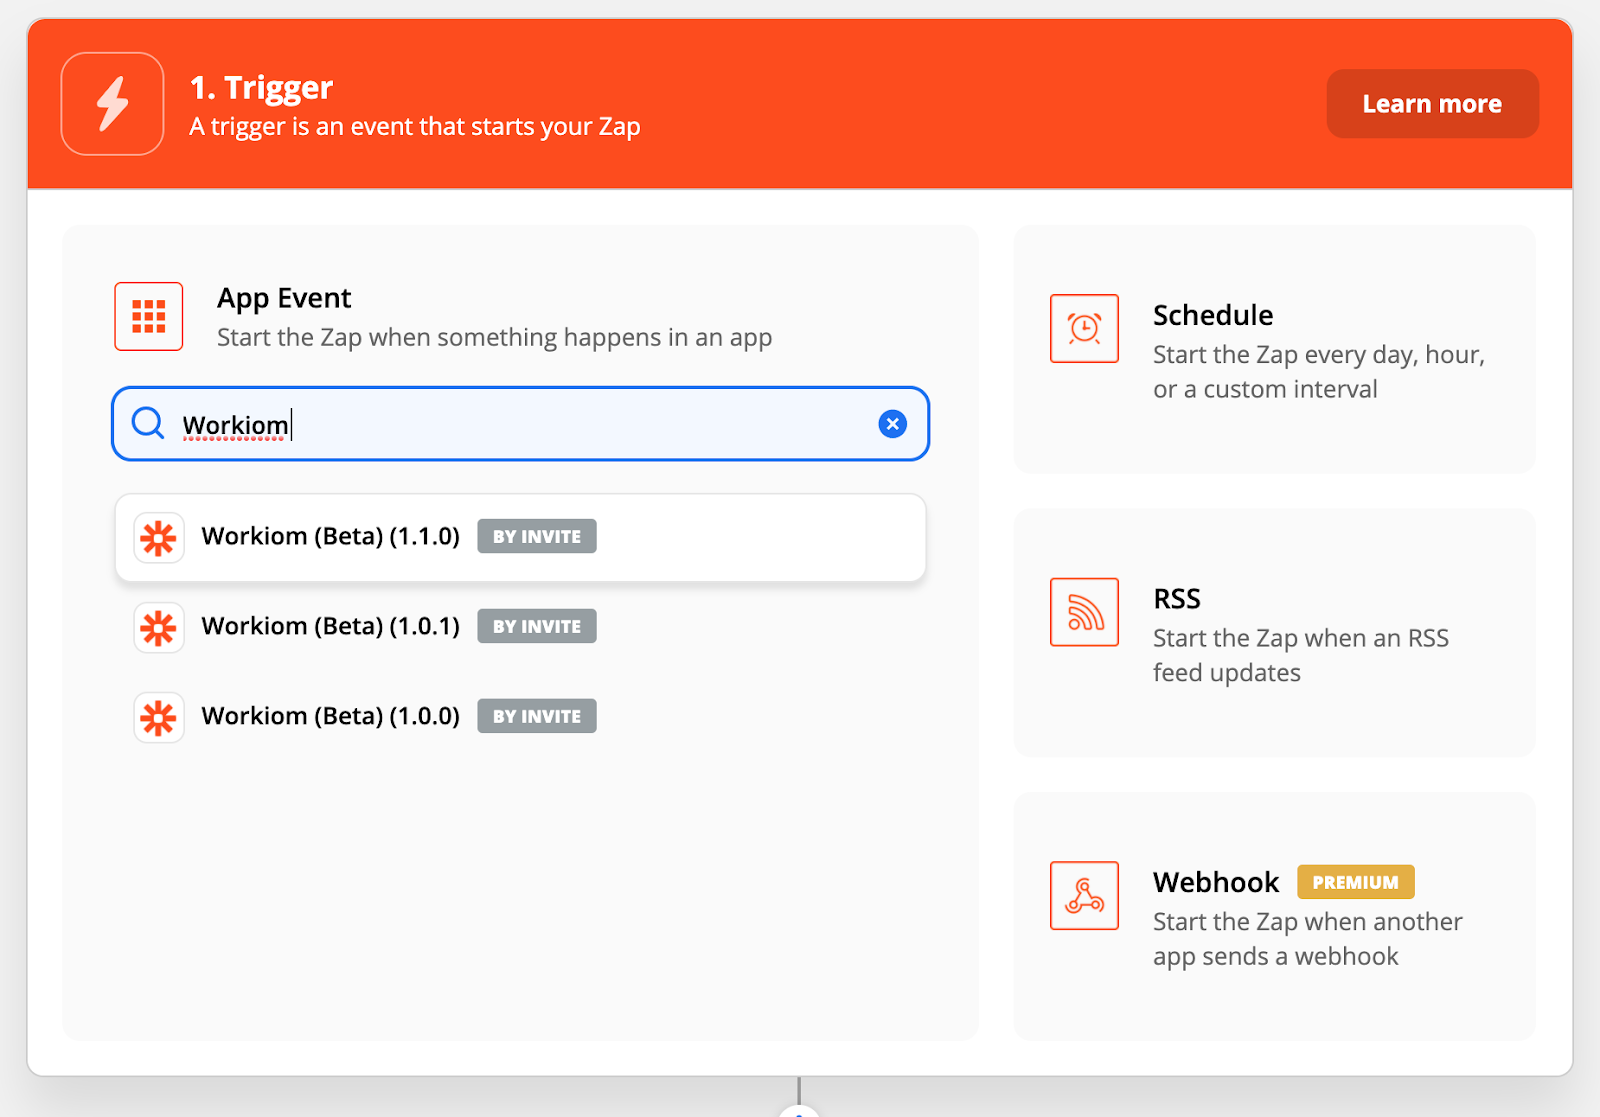
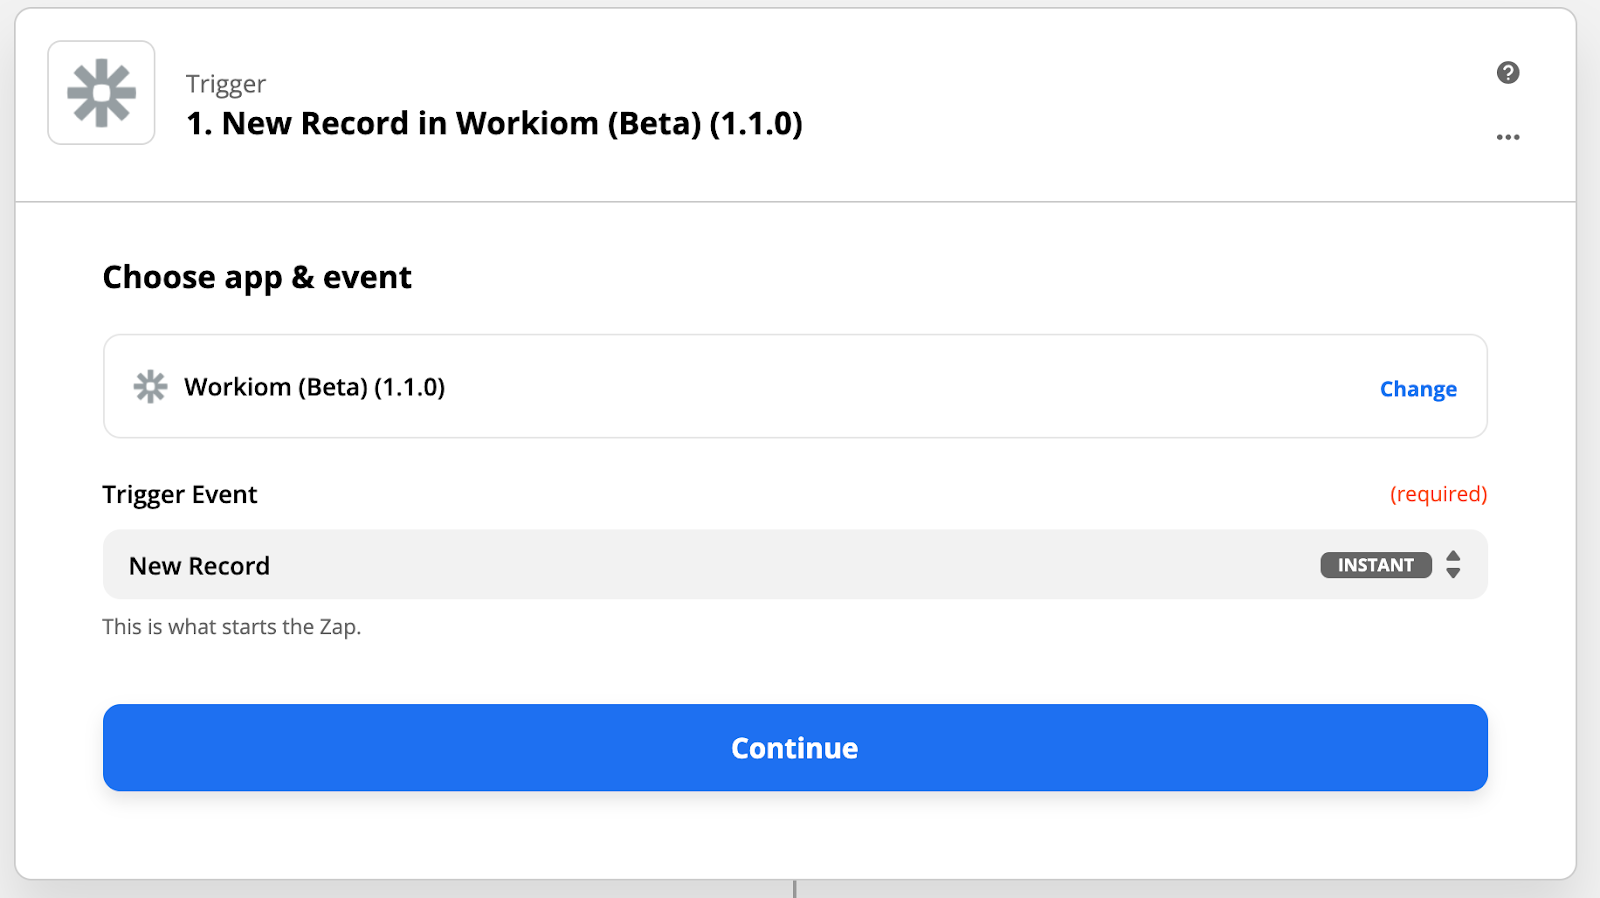
It is time to create a zap for automated invoice generation. Open your Zapier account and click on ‘Make a New Zap’. We will use our Workiom data as the trigger. In order to connect our Workiom account to Zapier, we need to get the API Key. Open Workiom, click on your name on the top of the left side bar and click on ‘My Profile. Here you can find your API Key. If you have not generated one before click on ‘Generate Key’ and then copy the key.
In our new zap, we should choose Workiom as the trigger app, make sure you choose the latest version of Workiom:
We will choose ‘New Record’ as the trigger event. You can also use ‘Update Record’ for this use case (trigger the zap when the status of invoice is ‘ready’ etc.) but I will directly get the new invoice records for this example.
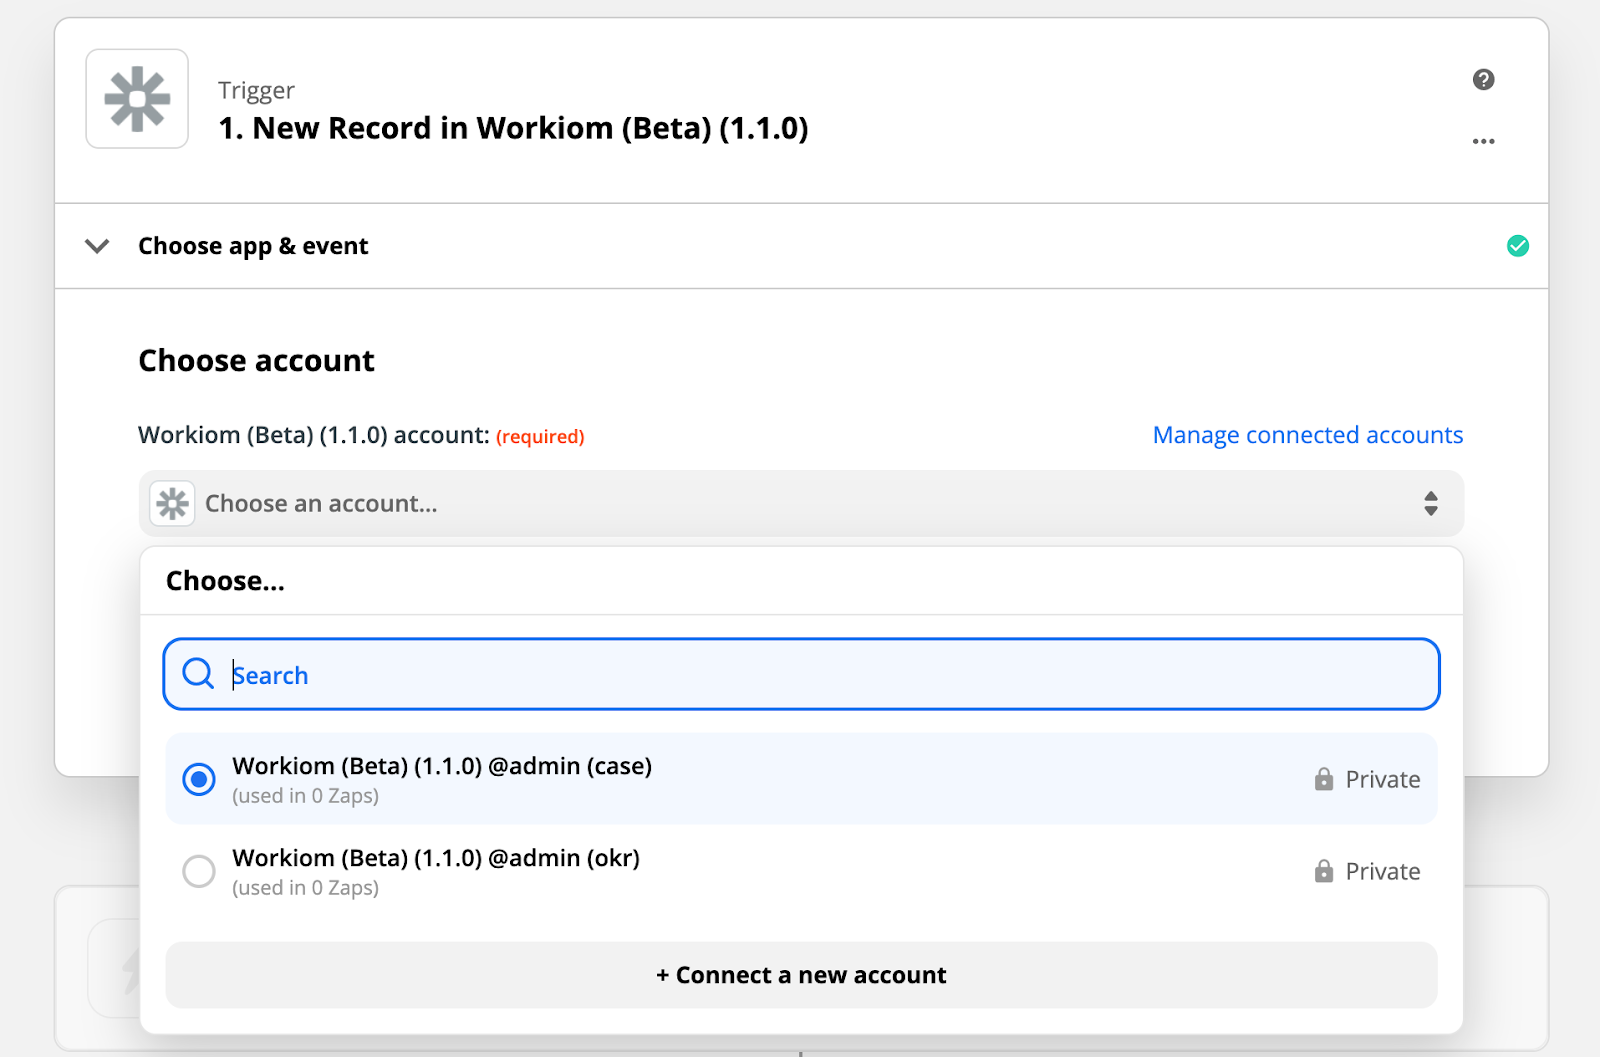
If you have already connected your Workiom account, choose it, if not enter your API Key to connect your account:
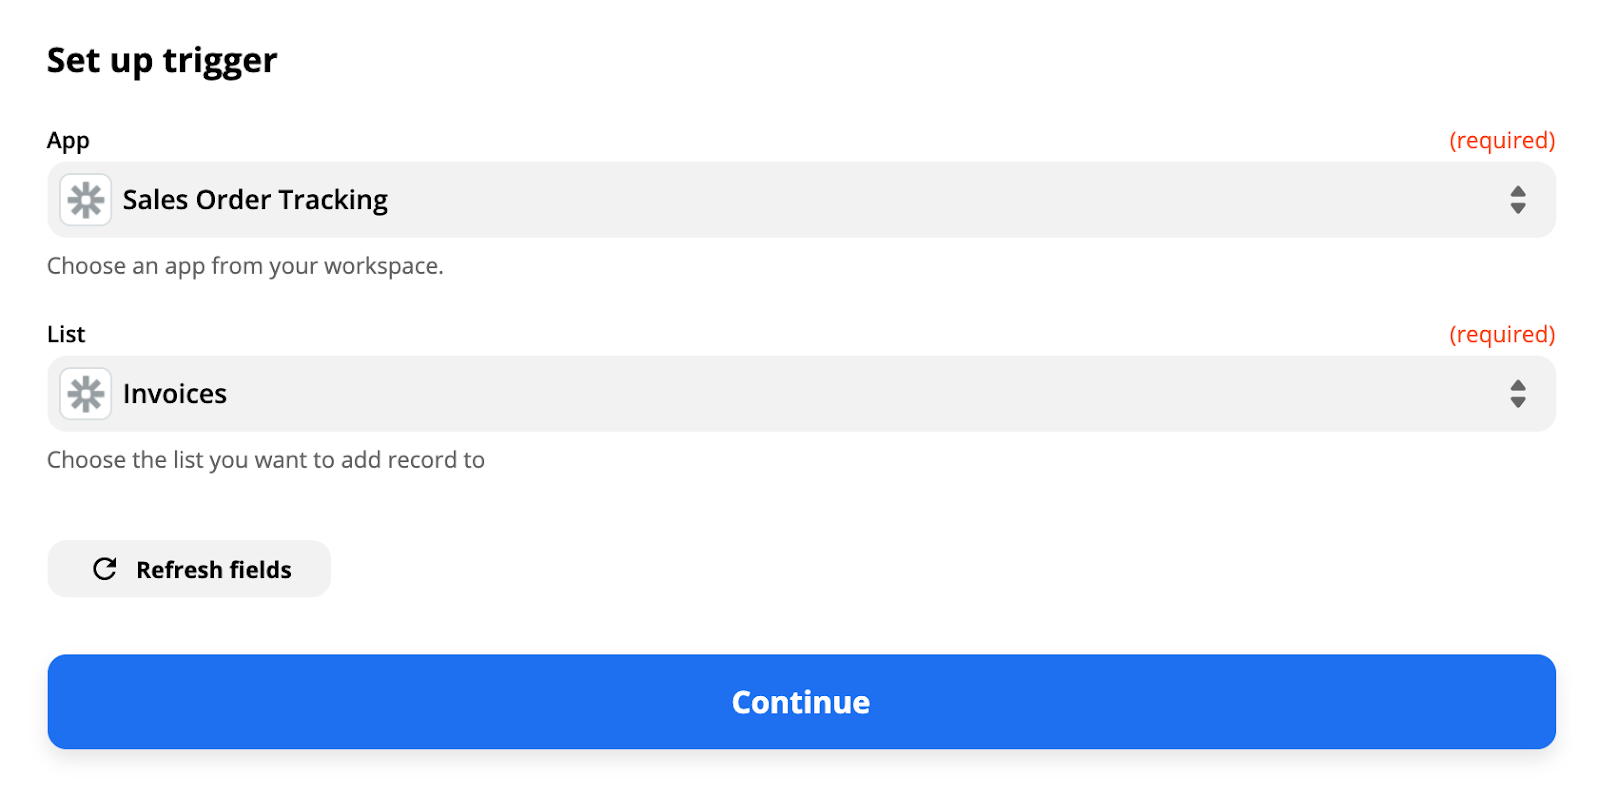
Set up the trigger by choosing the App and List name you will get the data from, for my example they are Sales Order Tracking and Invoices:
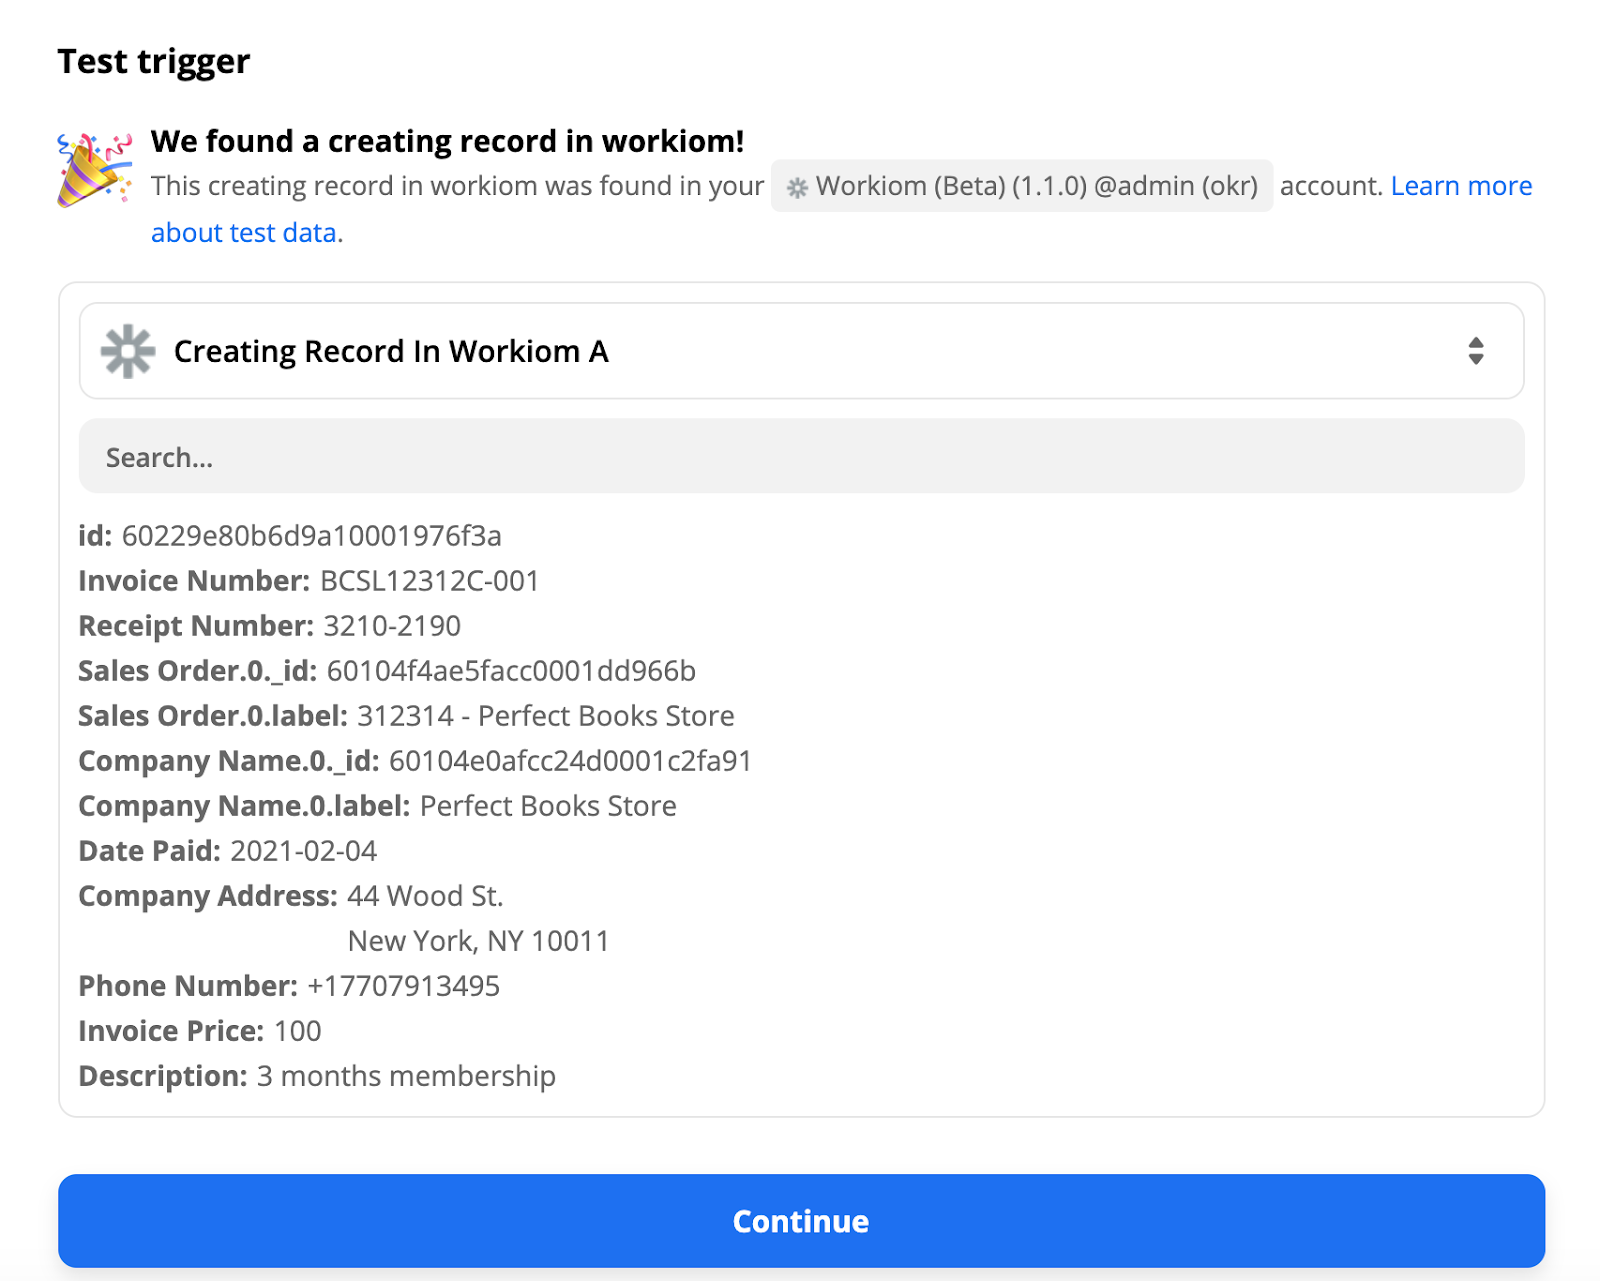
Test the trigger to see an example data from your Invoices list. Note that you should first create a record in Workiom to see an example data here:
Now we need to set up the action step by selecting Google Docs and selecting ‘Create Document from Template’ as the action event.

Sign in to your Google Docs account to connect it with Zapier and start configuring the details for your document.
After you finish mapping, it will ask you to test your zap. You can click on ‘Test & Review’ or ‘Test & Continue’ , Zapier will create a new document on your Google Docs folder to test the zap. Here is the new document created in my account:
If everything looks good, you can turn on the zap and start generating automated invoices. 🙌


.svg)
.svg)